环境配置
MAC IDA
开代理安装brew
/bin/bash -c “$(curl -fsSL https://raw.githubusercontent.com/Homebrew/install/HEAD/install.sh)”
brew安装Wineskin
https://github.com/The-Wineskin-Project/WineskinServer
1 | brew update |
Wineskin创建镜像
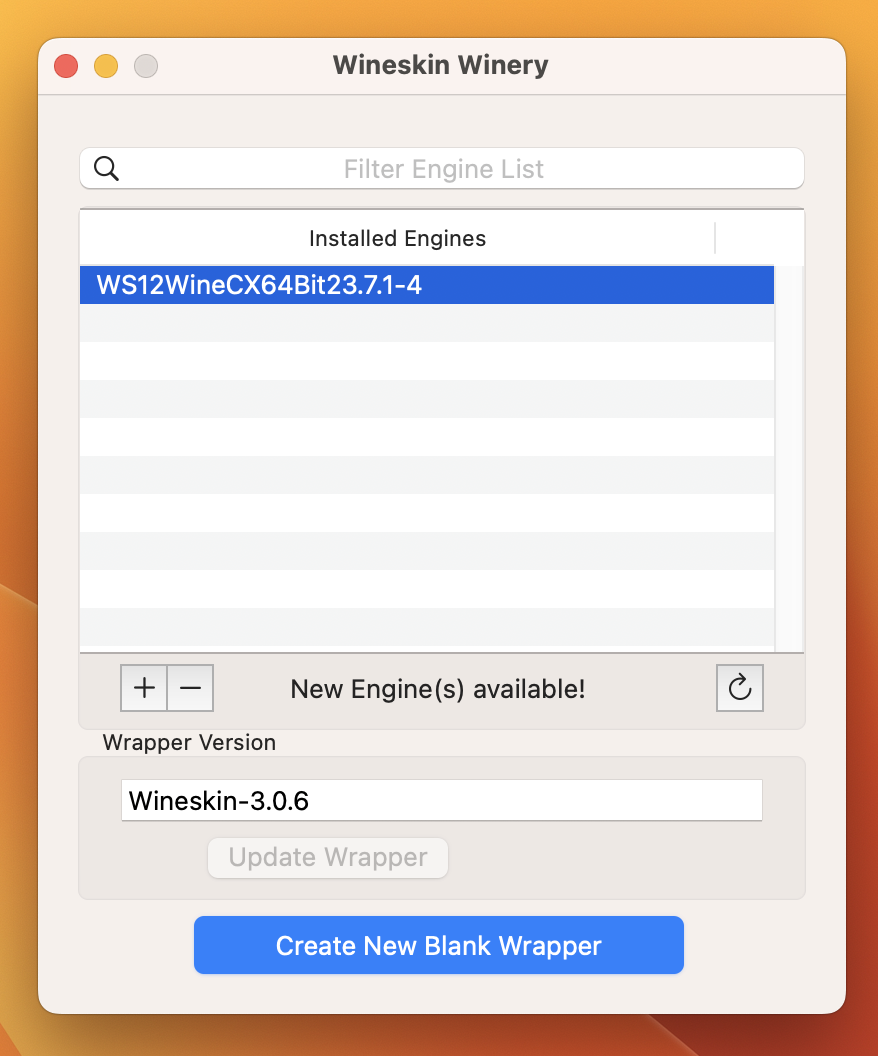
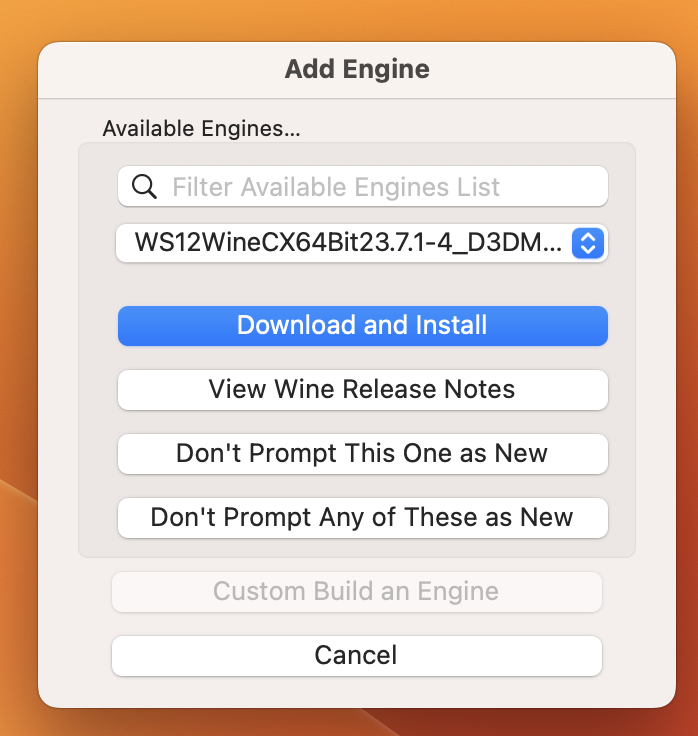
+ –> Download and Install –> Update Wrapper –> Create New Blank Wrapper –> set name –> OK
创建好后view in finder,双击打开

IDA安装
Install software –> copy a folder inside,选择IDA所在目录 –> select start exe/bat
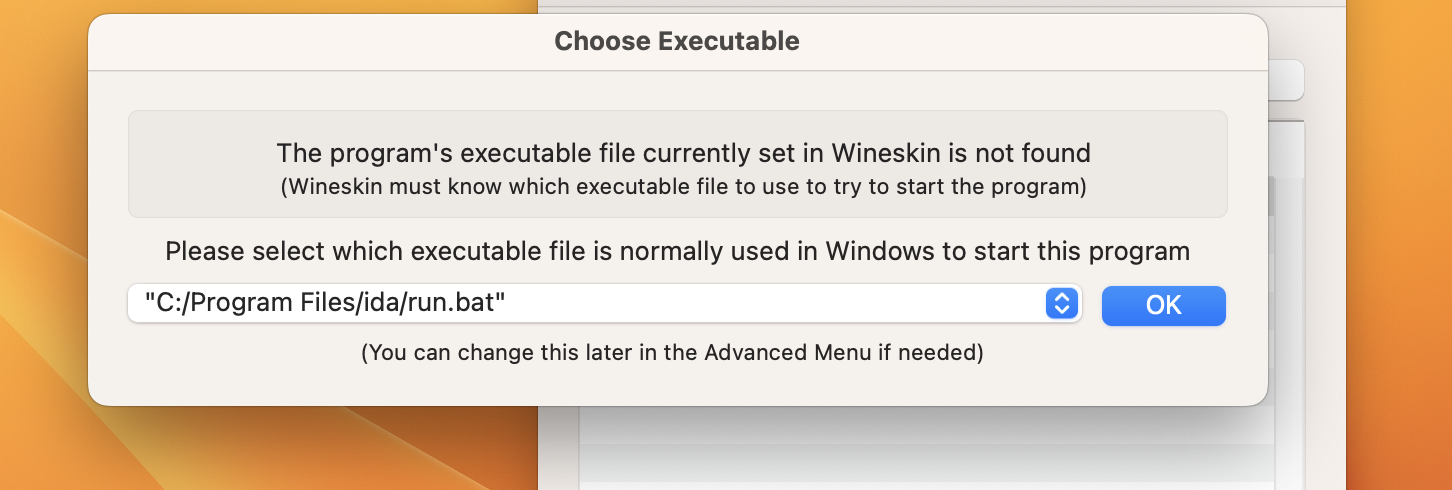
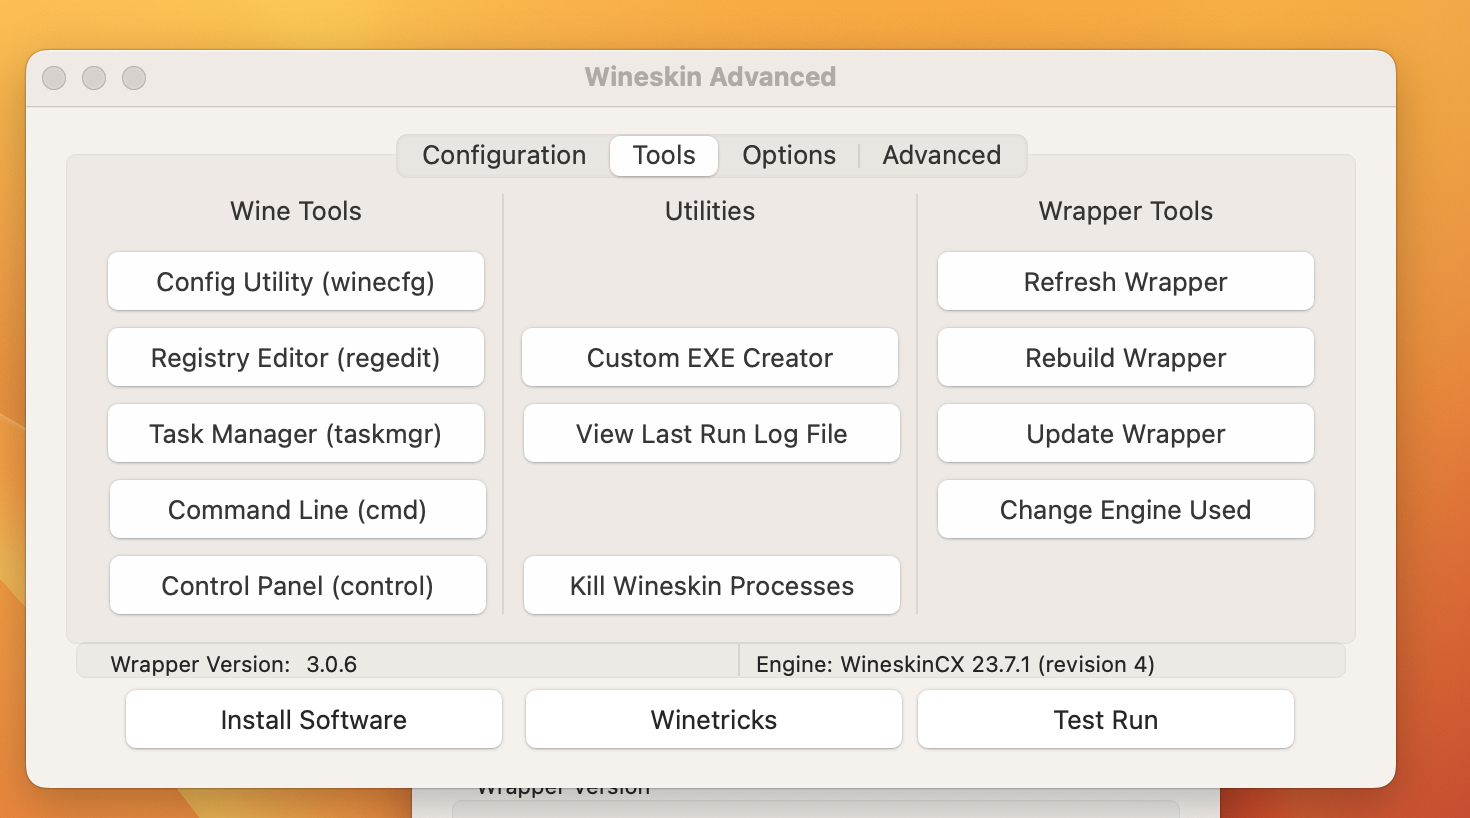
ok –> Advanced –> Test Run(处理注册表)
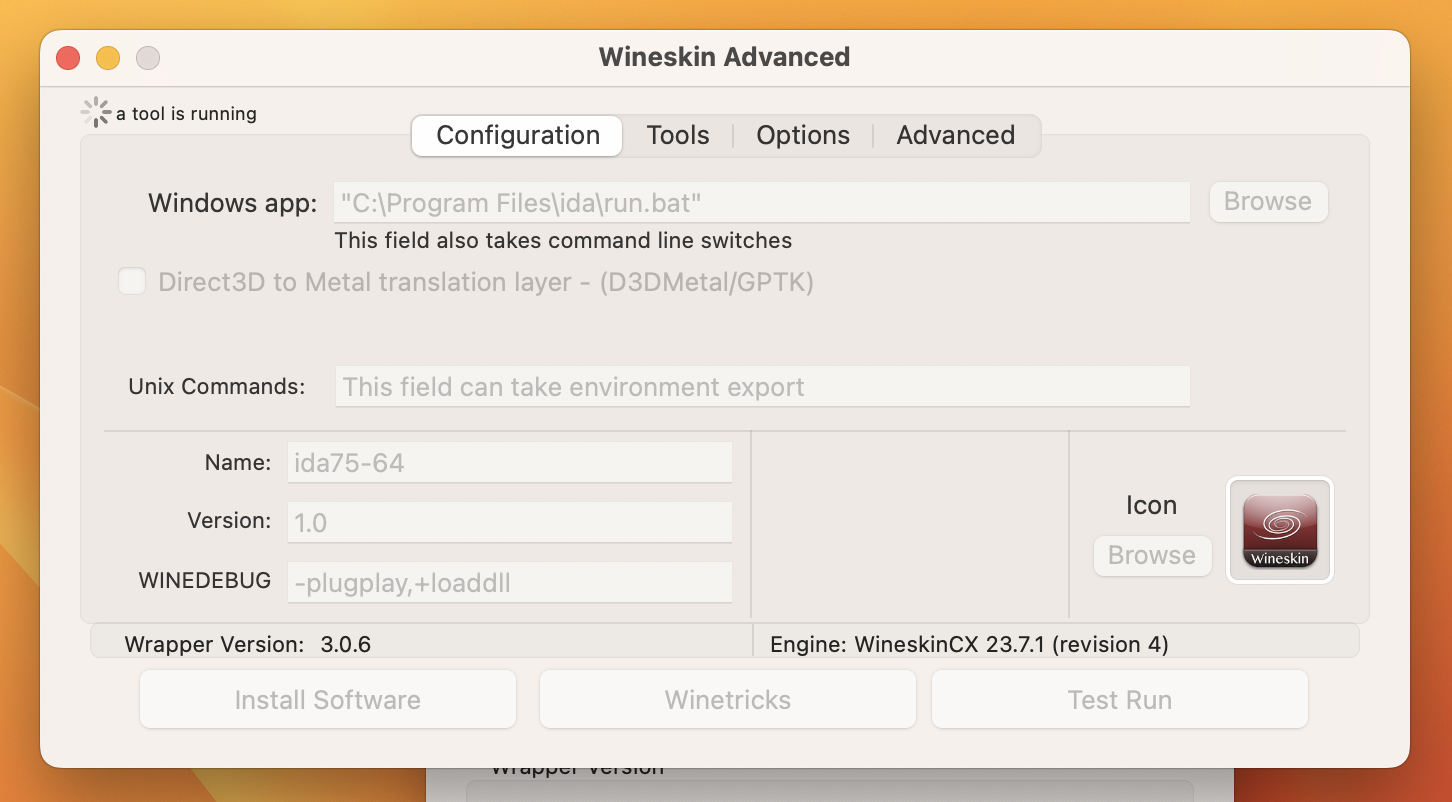
Tools –> Registry Editor(regedit)
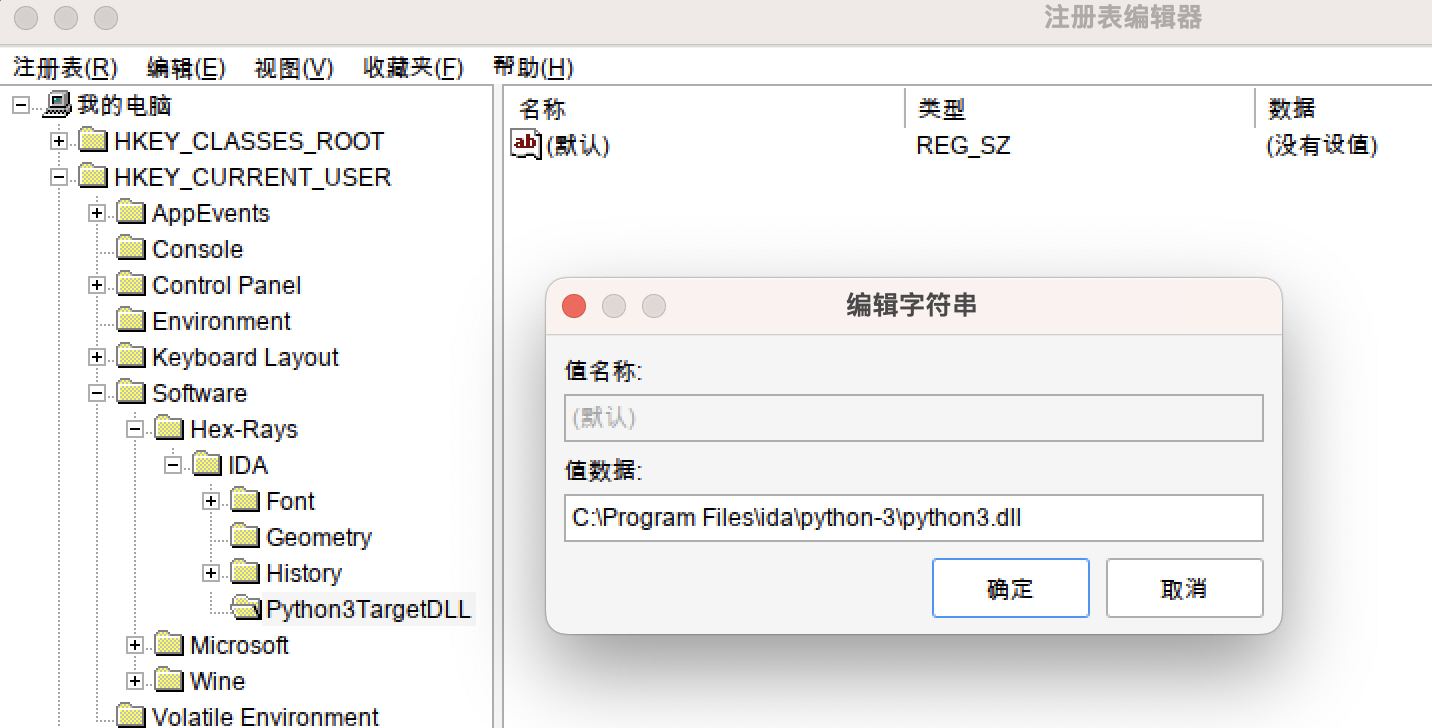
注册表修改
- HKEY-CURRENT-USER\SOFIWARE\Hex-Rays\IDA目录新建项Python3TargetDLL,值为python dll路径
- HKEY-LOCAL -MACHINEISYSTEM\CurrentControlSet\Control\session Manager\Environment 的PATH后面添加python路径
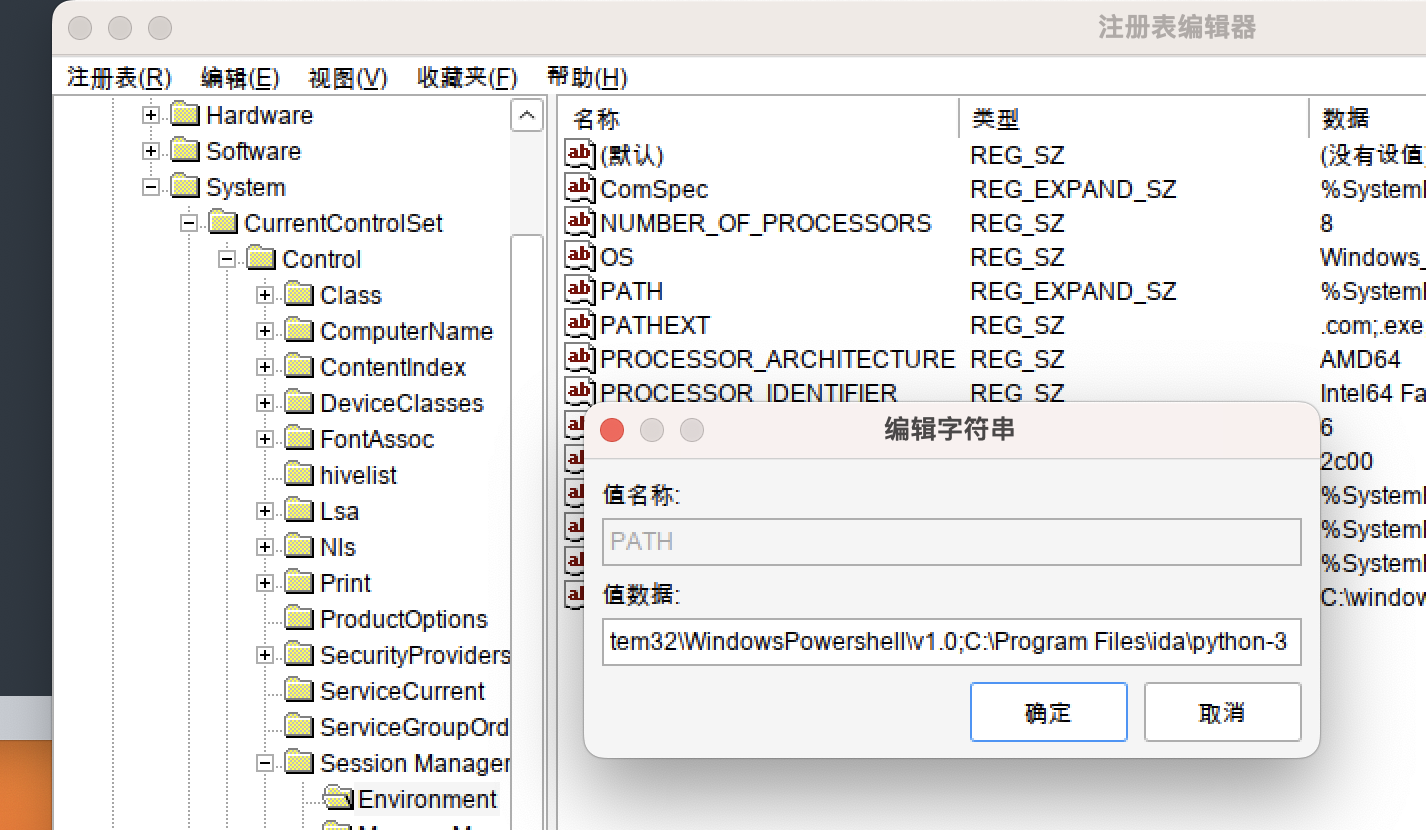
注册表配置好后kill Wineskin Processes –》Install software
自定义python路径
Download python zip
解压后放到ida的根目录
重命名
编写start bat
1 | @set path=.\python-3;%path% |
配置注册表
MAC Docker
Install
brew install docker
brew install docker docker-compose
Question: Cannot connect to the Docker daemon at unix:///var/run/docker.sock. Is the docker ...
brew install colima
colima start
执行docker命令
Docker angr
docker search angr
docker pull angr/angr
docker run -it angr/angr
llvm
1 | git clone https://github.com/llvm/llvm-project.git |
ollvm
1 | git clone |
use
1 | # c to ll |
MAC Unicorn
brew安装
brew install unicorn
python安装
pip3 install unicorn
编译
如果是mac的m系列芯片的话使用可能会报错bus异常,可以考虑如下解决方案
相关 Github Issue
编译unicorn
git clone https://github.com/unicorn-engine/unicorn.git
mkdir build & cd build
cmake ../../unicorn
make -j
cp file
- 把build目录的libunicorn.2.dylib libunicorn.a libunicorn.dylib三个文件copy到 python3.x/site-packages/unicorn/lib
MAC JADX内存限制修改
vim bin –> jadx-gui,修改下列内容中的最小和最大内存
DEFAULT_JVM_OPTS=””-Xms128M” “-Xmx8g””
ubuntu pyenv install
1 | sudo apt-get update |